
Help topics
Set up your classes and memberships
Create your plans, define the class types and the weekly timetable, review the rules and add your first members.
What it is for
It runs the schedule of your box or gym, your members and their memberships: which plans you sell, which classes you teach, who booked and who attended. This is a getting-started guide; the other tabs are explained on the screen itself.
Before you start
If you want to invoice each membership, have the product or service used to invoice the plan already created.
Steps
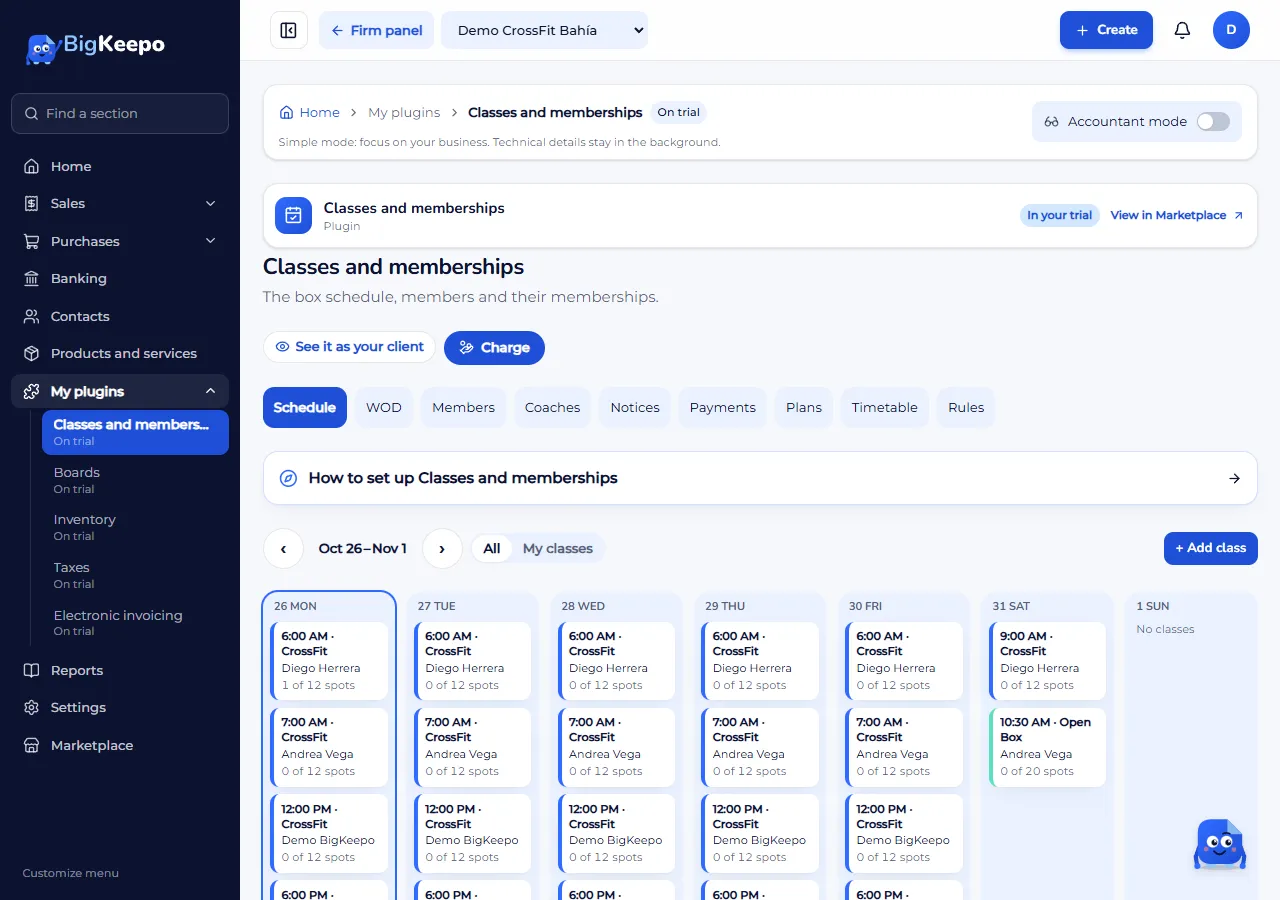
Open My plugins › Classes and memberships. At the top there are tabs: Schedule, WOD, Members, Coaches, Notices, Payments, Plans, Timetable and Rules. Below, How to set up Classes and memberships shows you the order: Plans, Timetable, Rules and Members.
In Plans, select New plan and answer the questions: What kind is it? (for example, Monthly unlimited, 8-class pack or Drop-in class), With or without a contract?, How many classes can they take? and For how many people? Enter the Name and the Price. If you are going to invoice, choose the Item used to invoice; if not, leave Do not invoice. Below you see What the member gets. Select Add plan. Creating a plan does not enroll anyone.
In Timetable, select New class type. Enter the Name, the Capacity, the Minutes and the Days shown, and choose the Color. Select Add type.
On the same screen, select Add class. Choose the Class type, the Day, the Time and, if you want, the Capacity and the Coach; if you do not have coaches yet, leave No coach and create them later in Coaches. Select Add class. The class repeats every week and each day's classes appear on their own in the Schedule.
In Rules, select Edit on Review or change rules and billing. Review Free cancellation until (minutes before), Members see and book classes for the next (days), Waitlist when the class is full and the notices. Under Billing, When a membership is added or renewed lets you choose between Do not invoice and Create its draft invoice. Select Save. Before adding a member with an email, expand Member app appearance and preview and complete the logo, the tagline and the color.
In Members, select New member. Enter the Name and, if you have them, the Email, the Phone, the Date of birth and the Staff notes. Select Add member. The member's record opens.
On the record, under Memberships, choose the Plan, the date it Starts, Expires on (optional) and the Price if it differs from the plan's, and select Add membership. If the member has an email, they sign in to the member app with their email and a code.
Open Schedule and select a class. There you see the enrolled people, can add a member with Add a member and mark Arrived or No show.
Expected result
Your plans and your weekly timetable are ready, the Schedule shows each day's classes with their capacity, and each member has their membership and status: Up to date, Expiring, Expired, Frozen or No membership.
If something goes wrong
The Schedule says "There are no classes yet": the timetable is missing. Select Go to the timetable and create a class type and its classes.
It says "Create a class type first": in Timetable, create the type first and then the class.
It says "To register someone with an email (they get into your app), first complete your app: logo, tagline and color, in Settings": do it in Rules, under Member app appearance and preview.
It says "That contact is already a member": find the member in Members and add the membership from their record.
It says "It overlaps another membership of the member": the member already has a membership on those dates. Change the Starts date.
It says "Membership saved. The invoice was not created: choose the item used to invoice in the plan": open the plan and choose the Item used to invoice.
You want to see what the member sees: select See it as your client, above the tabs.
Related articles
Was this helpful?